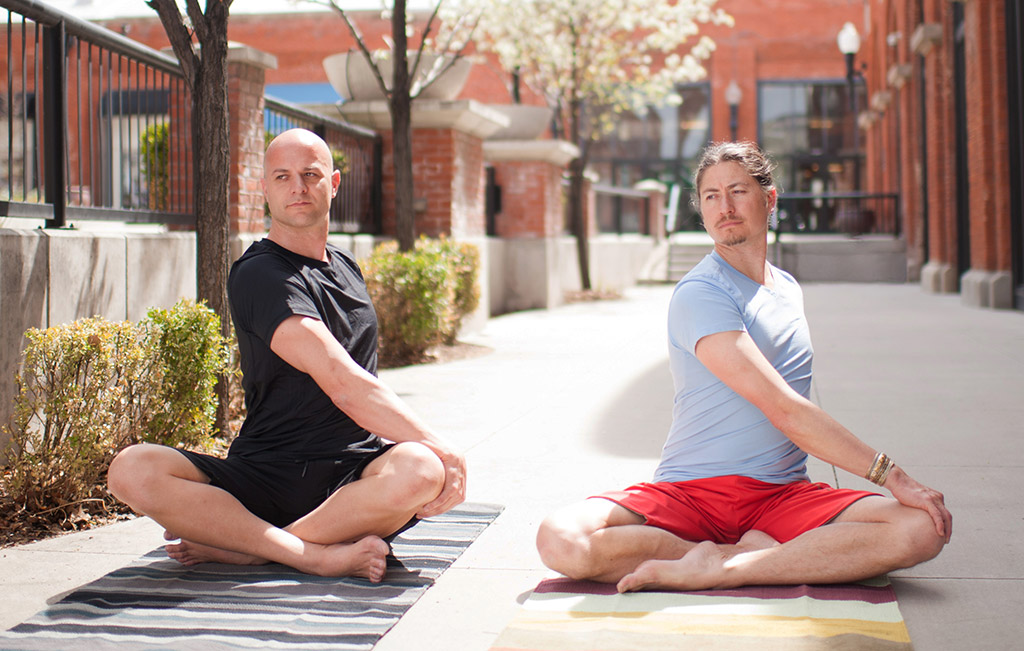
I recently had the good fortune to sit a 18-day silent Insight Meditation retreat. A friend once compared these sitting marathons to extreme sports, calling them “extreme sitting.” It’s kind of true. All in all, at this particular retreat, we sat for almost eight hours every day, alternating with five hours of walking meditation, in 45-minute increments.
In 1988, when I first started going to silent retreats, I was surprised by how rigorous it was for my body to sit that long. There were burning, stabbing, pulsating, vibrating, piercing sensations pretty much everywhere in my body, and my mind compounded the suffering with its constant complaining.
The physical practice of yoga asana was developed to make sitting meditation easier by smoothing out agitation; untying stubborn knots; and creating continuity in the legs, hips and spine. When I studied with B.K.S. Iyengar he said, “Practicing asana relaxes the body to create a peaceful environment for the mind to dwell.” If your body is unable to settle, your mind will have a much more difficult time becoming quiet.
Sukhasana: Sitting with Ease
Traditional interpreters of yoga philosophy say that the word asana means simply “to sit,” that asana practice really includes only Sukhasana (Cross-Legged Pose) or the far fancier and more difficult to attain Padmasana (Lotus Pose).
Sukhasana is most often translated as “Easy Pose.” Many people don’t find it so easy however. People whose hip joints do not easily externally rotate or whose hamstrings, outer thigh muscles, hip rotators or quadriceps are tight find it downright difficult. I prefer to interpret Sukhasana as “Pose of Ease.” So even if the pose isn’t easy, most of us can find ease in it with a little help.
Over time, practicing hamstring, quadriceps and hip rotator stretches can help make Sukhasana easier. But elevating your rear above your ankles is the most essential element of ease in sitting, even if you’re flexible. Elevating your pelvis encourages it to tilt slightly forward. When that happens, your spine can more easily form its healthy “S” curves, which allow it to maintain a vertical position without our having to exert a lot of energy.
That said, for people whose hip joints don’t externally rotate, a mountain of blankets may never make Sukhasana easy. When your knees are above your pelvic rim in Sukhasana, your pelvis will tilt backward and your lumbar spine will have to round. If this is the case for you, I invite you to give yourself permission not to practice Sukhasana. Sitting on a meditation bench or in a chair—both effective sitting postures—will likely be a better choice for your meditation sitting practice.
Maintaining your natural spinal curves is particularly important when we add a spinal rotation to Sukhasana. When we practice Parvrtta (Rotated) Sukhasana, keeping the spine curvy helps keep our intervertebral discs from being compressed in the process of turning. Adding a twist to Sukhasana before you settle into sitting meditation can release tension in the spinal muscles for a more comfortable physical experience, and can smooth your nervous system by shifting you toward the parasympathetic (rest and digest) side of your autonomic nervous system. This helps create the conditions for a quieter mind.
How to Practice Parvrtta Sukhasana
- Start by sitting on a Zafu Cushion or firm, folded blanket. Reach back and feel your lumbar spine. If you feel the knobby spinous processes poking out, your lumbar curve is convex rather than concave. Add more height under your pelvis. In my book, Yoga for Meditators, I devote an entire chapter (titled “Setting Up: Finding the Right Support”) to finding the right sitting position, and how to choose the right seat (Zafu vs. V-Shaped Cushion vs. Meditation Bench vs. blankets vs. chair).
- Cross your legs, drawing your ankles in close to your pubic bones. If you feel discomfort in either knee, you can elevate it by placing a folded blanket or yoga block underneath.
- Ground your pelvis as you lengthen your spine upward. Now scoot your right sit bone back an inch or two. Turn your torso to the right and place your left hand on the outside of your right thigh.
- Rotate to about 90 percent of your capacity and breathe deeply. Note how the breath asks your body to move. Does your body move into or out of the twist on the in-breath? How does your body naturally move on the out-breath?
- Allow your breath to guide you into the asana. Is your left arm forcing you to rotate further? If so, relax it. Do not force your body to continue moving further if your inhalation or exhalation asks your body to retreat.
- Take 5 to 10 deep, full breaths. Return to the center, squaring your pelvis, and check in with what you feel. Switch the cross of your legs and repeat on the other side.
How to Practice in a Chair
- Sit sideways on an armless chair such as a folding chair or kitchen chair so that your right side is facing the back of the chair.
- Turn your torso toward the back of the chair, allowing your right hip to scoot back a bit.
- Rotate to about 90 percent of your capacity and breathe deeply. Note how the breath asks your body to move. Does your body move into or out of the twist on the in-breath? How does your body naturally move on the out-breath?
- Allow your breath to guide you into the asana. Are your hands on the back of the chair forcing you to rotate further? If so, relax. Do not force your body to continue moving further if your inhalation or exhalation asks your body to retreat.
- Take 5 to 10 deep, full breaths. Return to the center, squaring your pelvis, and check in with what you feel. Switch the cross of your legs and repeat on the other side.
Updated article from September 11, 2013.
