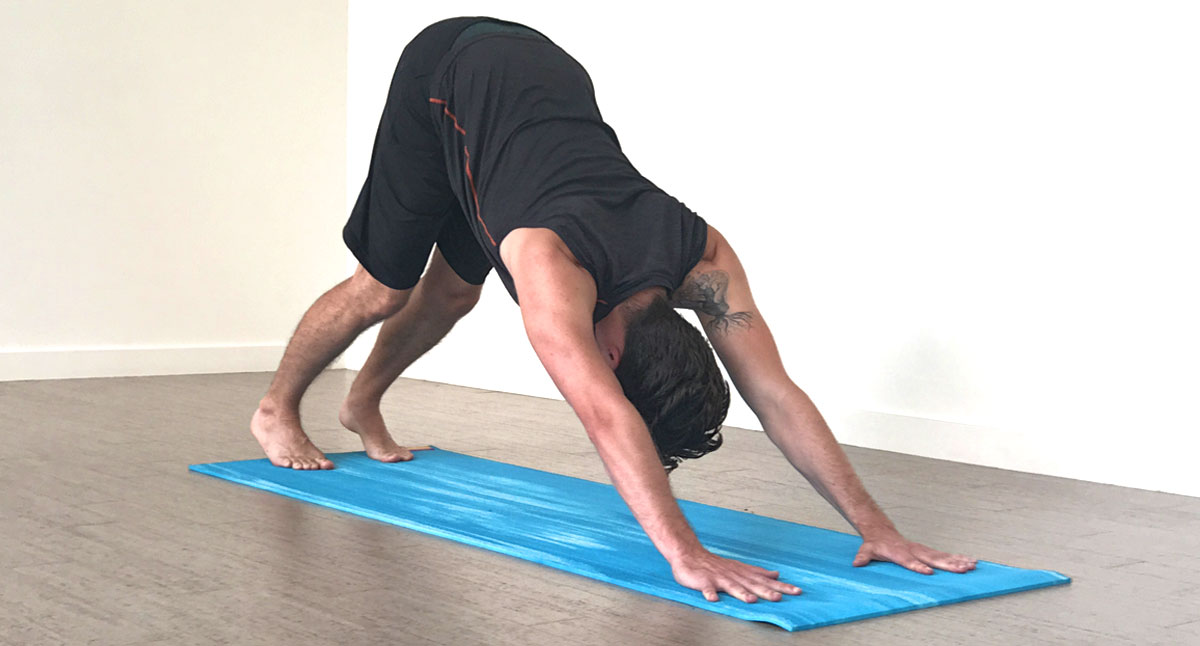
Adho Mukha Svanasana (Downward Facing Dog Pose) is arguably the most ubiquitous of poses. Yoga teacher Donna Farhi calls it the “garlic” of yoga poses—a panacea for whatever ails you.” Dog Pose is simultaneously an inversion, an arm balance, a forward bend and a restorative pose. It opens your shoulders, strengthens your arms, lengthens your spine, stretches your legs, inverts your internal organs and nourishes your brain. It invigorates and calms. For dogs and cats, Dog Pose is the equivalent of a morning cuppa, a remedy that clears sleep-induced physical and mental cobwebs.
In Vinyasa practice, Dog Pose serves as a jumping-off pose for the quick transitions. In some of the sweatier classes, yogis and yoginis may move through Dog Pose 20 or more times in a practice.
Bodyworkers I know tell me that they’re seeing increasing numbers of hand and wrist problems in people who practice yoga. Sun Salutations, with their central Dog Pose-Chaturanga Dandasana–Upward Facing Dog sequence are at least partially responsible. If you’re practicing multiple Sun Salutations, you will likely cycle through these poses many times. Even if you only practice a few Dog Poses during a practice without the rest of the sequence, the weight bearing can take a toll.
Why Your Wrists May Be at Risk
Wrist and hand problems arise because we often let our weight collapse into the heels of our hands. One solution is to activate the legs more by sending the thighs, shins and heels back. But activating the legs may not alleviate the problem completely. I like to practice using a multi-pronged approach: activating my legs and practicing common sense alignment in my hands and arms.
 The traditional alignment in Dog Pose calls for placing your hands shoulders-width apart on the floor. When the hands are in this alignment, the weight of your body tends to fall into the outer sides of your hands. On the little finger side of your hand, just above your wrist in the bottom corner of your palm is a little bone that sticks out. You can easily feel it on your own palm. This is the pisiform (pea-shaped) bone (in red in the diagram at left). Repeatedly collapsing your weight into this point on the hand could lead to a stress fracture. Spreading the weight evenly throughout the heels, balls and fingers of your hands will help prevent this.
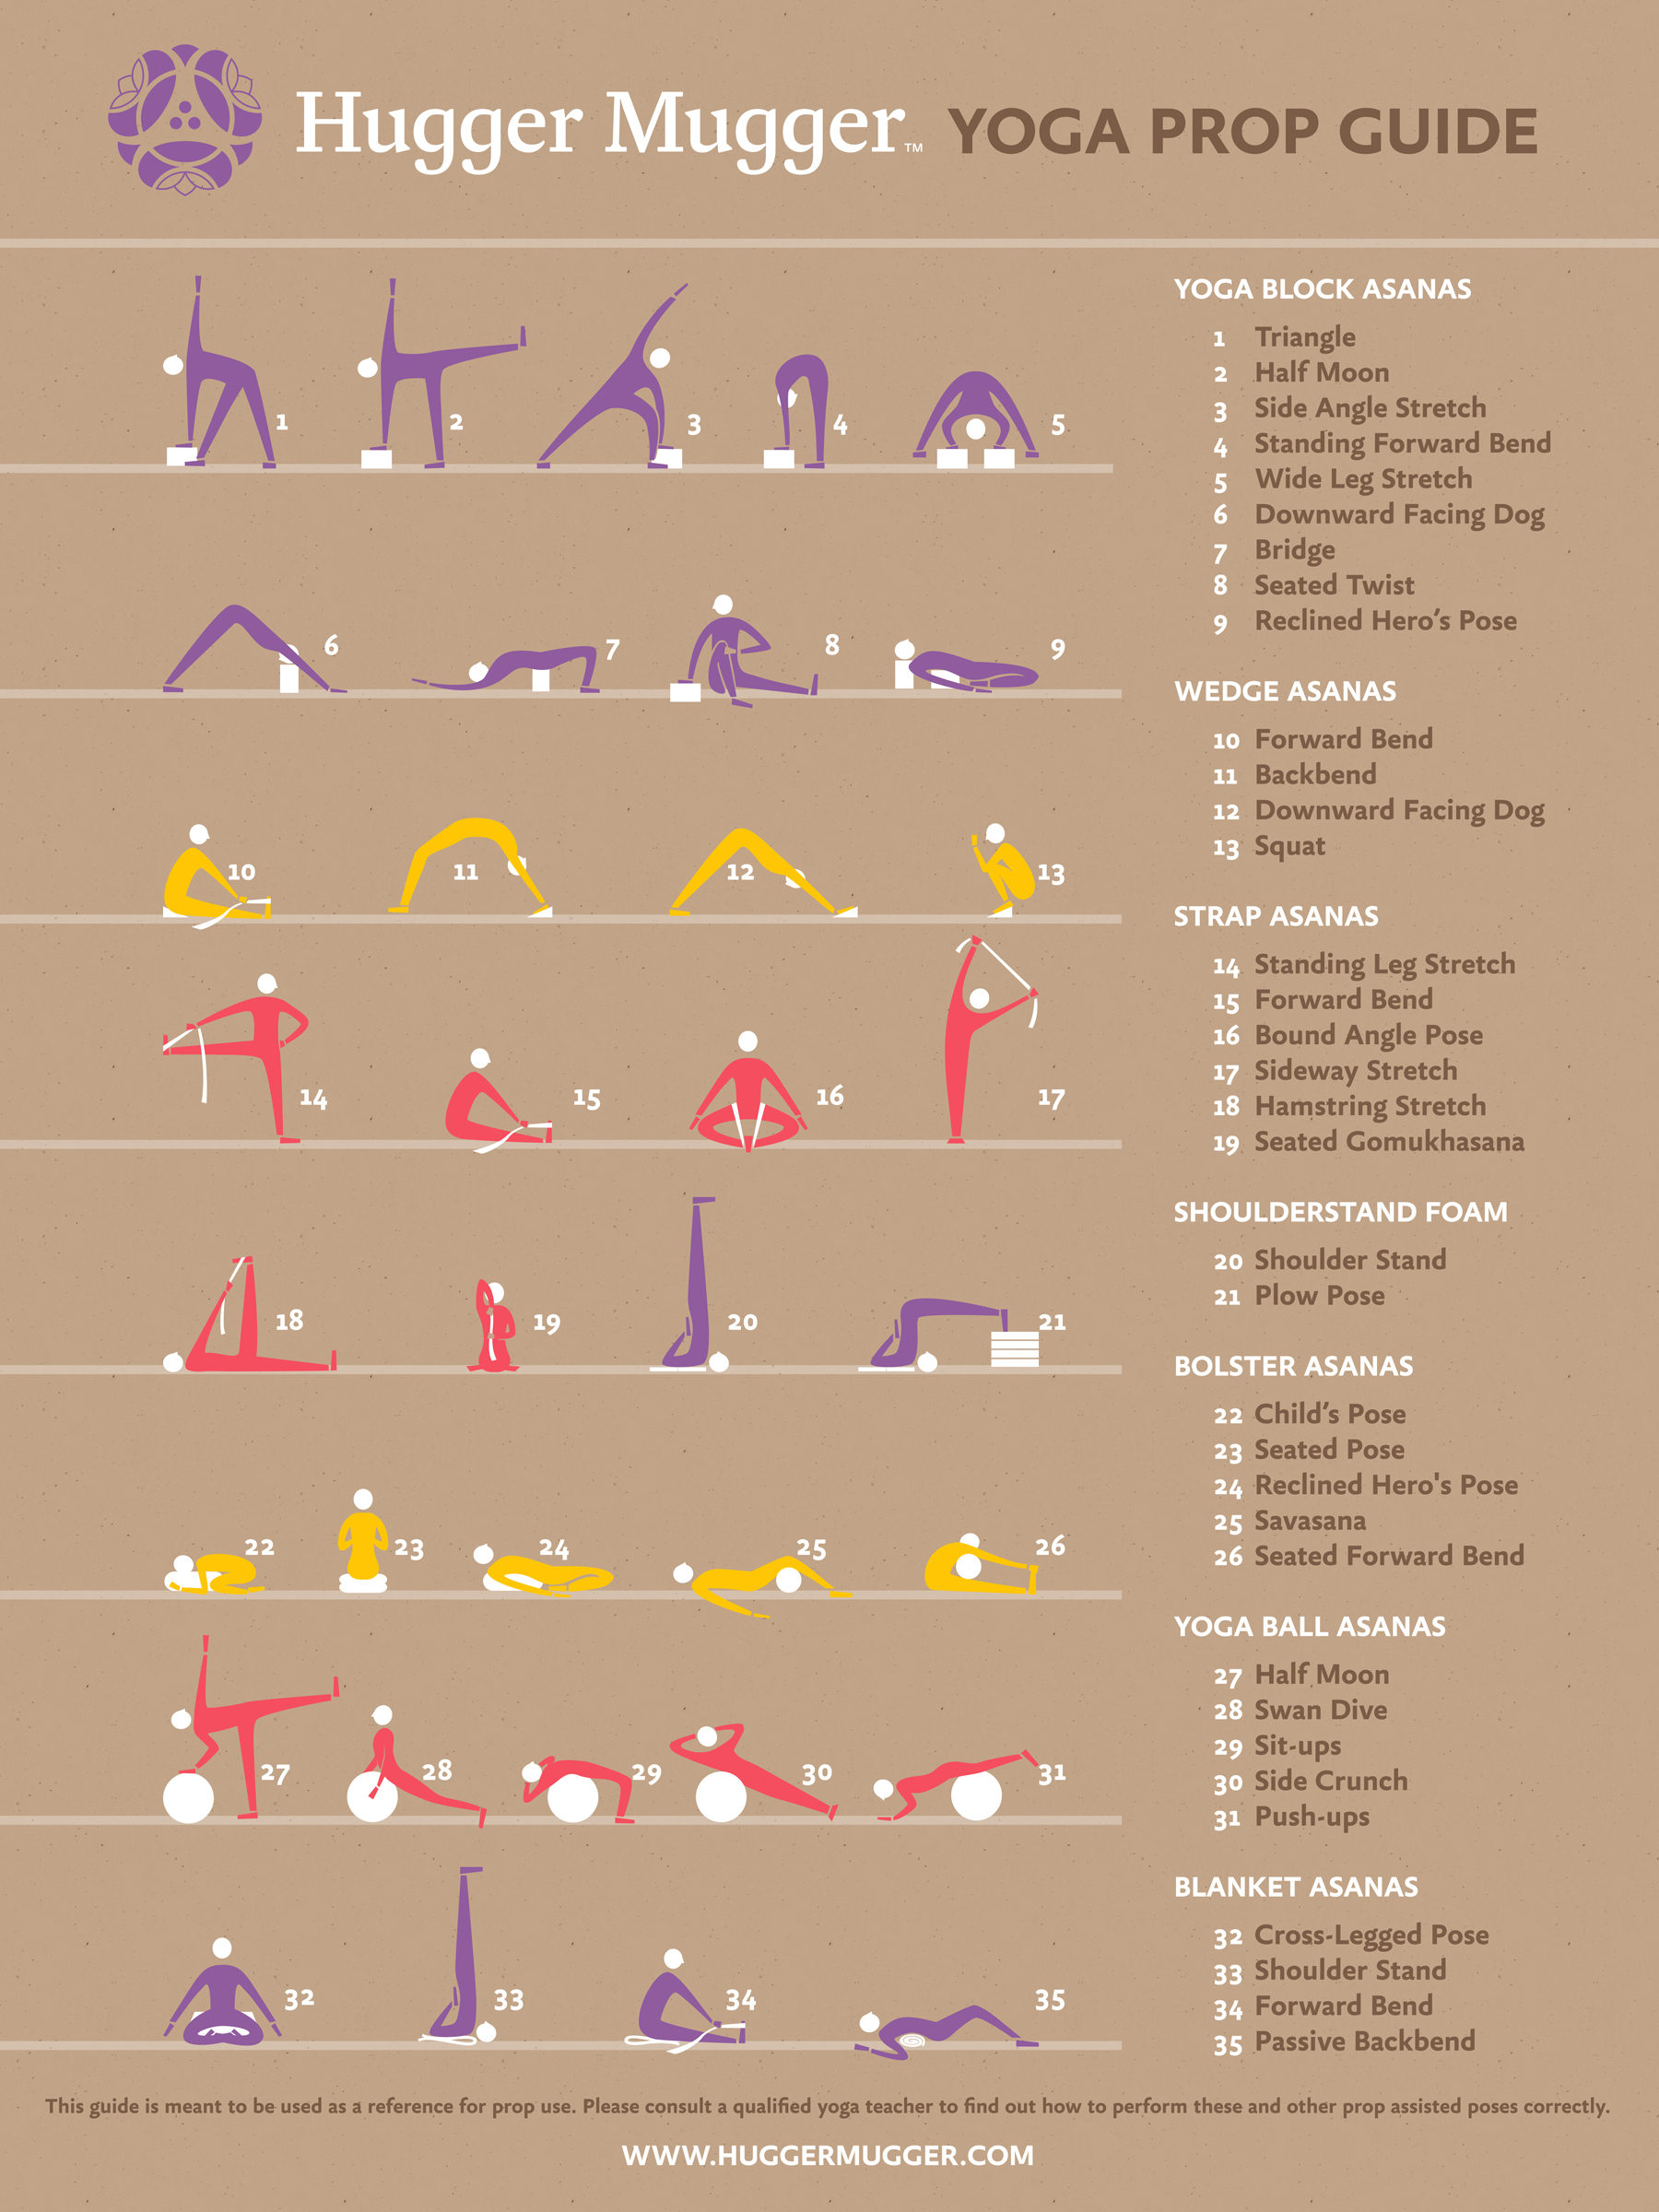
One way to distribute your weight more evenly is to widen your hands, which will tend to center the weight more on the thumb side. Another way—which I prefer—is to spread your fingers and align your hands with each other so that your index fingers are parallel to each other. In other words, you can rotate your hands out a bit. I also like using a wedge (in cork or foam) to train my students’ hands to take the weight evenly.
How to Use a Wedge
- Place a wedge in front of you with the narrow side facing you, so that the wedge is sloping down toward you.
- Place the heels of your hands on the edge that’s facing you and press the balls of your hands and fingers into the wedge as you move into Dog Pose.
- Continue to press with the balls of your hands and fingers so that the heels of your hands actually begin to raise slightly off the wedge.
When Hugger Mugger first published a graphic of my recommendation for using a wedge in Dog Pose in the Prop Guide, there was a wave of feedback that this was the opposite way it should be done. Most people feel that the wedge should slope down away from them so that they decrease the angle of the wrist.
But the angle of the wrist is not generally a problem in Dog Pose. The angle in Dog Pose is actually quite gentle—unlike Chaturanga Dandasana, Upward Facing Dog Pose and many others. Check out this photo and you’ll see what I mean. Even with the wedge, the angle of between the hands and forearms is nowhere close to 90 degrees. The hand and wrist problems come from collapsing of weight onto the heels of the hands. Placing the wedge with the raised edge away from your body only increases the angle of the wrist slightly. Plus, it’s much easier to distribute weight into the balls of the hands when they are at this angle.
I usually tell students, especially if they already are feeling strain in their hands and wrists, to practice with a wedge for at least a few months. This gives them the time to build strength in their arms and train their hands so that when they stop using a wedge, healthy weight distribution will be a habit.
The wedge is a great tool for teaching your arms how to build strength and stability. Try this and let us know how it works for you!