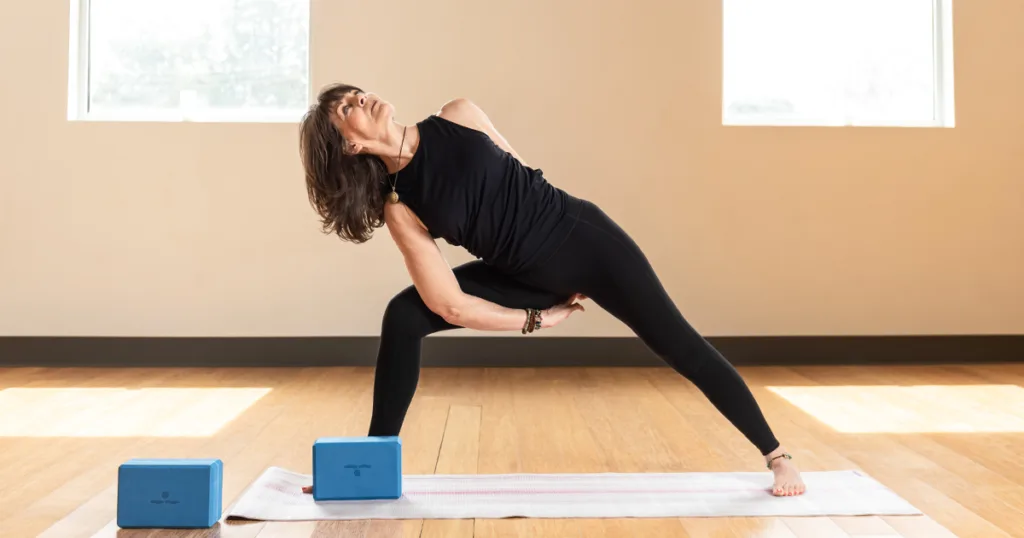
When I think of Parsvakonasana (Side Angle Pose), I often picture the long, continuous line of extension on the top side of the body. That stretch is surely one of the pose’s great pleasures. I especially love Parsvakonasana after sitting at a desk or riding in a car for too long. But there’s not just one way to practice the pose. Baddha Parsvakonasana (Bound Side Angle Pose) adds a chest- and shoulder-opening component that can also bring welcome relief from too much forward hunching.
Like all of yoga’s wide-legged standing poses, Parsvakonasana cultivates strength, stability, balance, flexibility and expansion, all at once. It strengthens the legs and the core, and nurtures the back. Practicing Baddha Parsvakonasana provides the added benefit of strong shoulder joint opening. It demands more of the core and legs than the traditional pose. This is because people often collapse onto their bottom hand or arm, which disengages the core and legs. So practicing with the arm bind can increase the strengthening power of the pose.
Contraindications for Baddha Parsvakonasana
As with all yoga poses, Parsvakonasana and Baddha Parsvakonasana are contraindicated in certain situations. If you are experiencing headaches, or shoulder or neck pain, avoid practicing the pose. People who experience insomnia should practice this pose early in the day rather than in the evening.
This variation is not for everyone. In order to complete the arm bind, your torso has to be very close to your thigh. You also need to have relatively long humerus bones in order to be able to bend your bottom elbow under your front thigh. If you attempt the bind and find that your breathing becomes inhibited because of the position of your torso, it’s better to practice the traditional expanded version of the pose.
How to Practice
- Stand in Tadasana (Mountain Pose) in the center of your Yoga Mat.
- Separate your feet 2-½ to 3-½ feet apart. In deciding how far to separate the feet, take into account both stability and expansion. In other words, if your feet are too close together, you may feel “stuck” in the pose. If your feet are too wide apart, your legs won’t be able to support you with strength. There’s no one-size-fits-all, “perfect” stance beyond the one that gives you solid support in your pose. Feel free to try different stances to find what’s best for your particular structure.
- Turn your right leg out 90 degrees. Internally rotate your left leg—including your pelvis—about 45 degrees. Do not square your hips to the front. If you’d like to know why this popular, but anatomically nonsensical, cue is not a good idea, read this post.
- Extend your arms outward from your shoulders.
- Bend your right knee into about a 90-degree angle so that your knee is right over your ankle. You may need to adjust the distance between your feet in order to find this position.
- Continue to allow the left side of your pelvis to rotate forward. You can play with the rotation to find the position that feels the most stable for you.
- Extend your torso out over your right thigh.
- Lower the torso so that you can place your right shoulder on the right inner thigh, and bend your elbow underneath the right thigh. If your elbow doesn’t bend under the thigh, or if you find breathing to be difficult here, place your elbow on top of your thigh instead and extend your left arm out overhead.
- If you’re practicing the bind, extend our left arm back, bend your elbow, and connect your hands. If your hands don’t connect, you can try dangling a Yoga Strap from your left hand to your right hand, and connect your hands that way.
- Stay for 5 to 10 deep breaths. Then raise your torso upright, turn your feet to parallel and rest for a few breaths before taking your second side.
