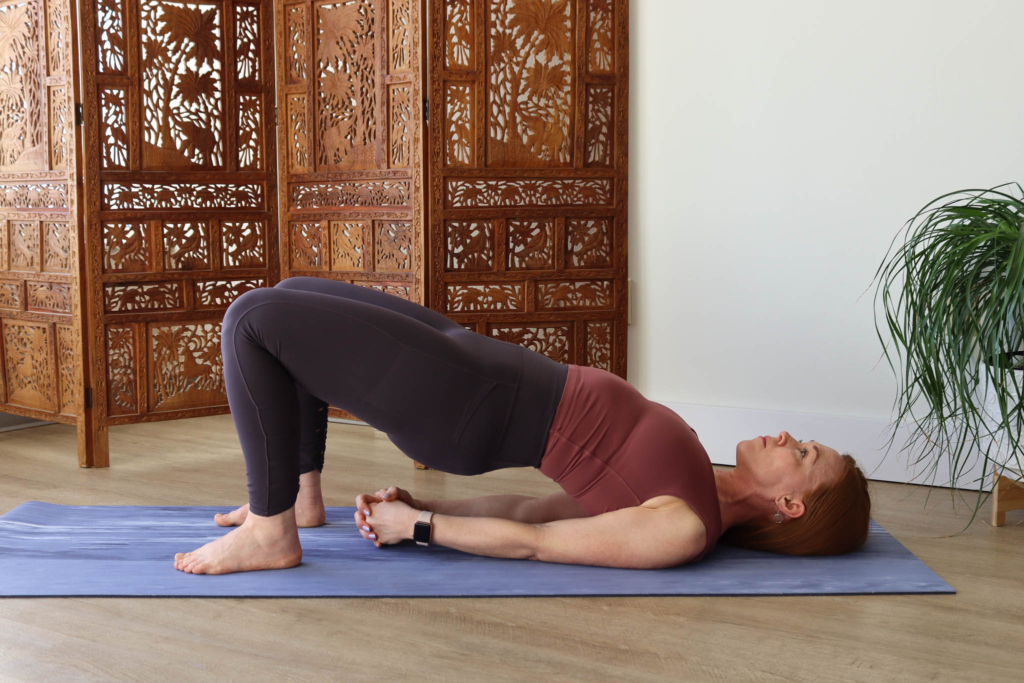
I’ve been writing for Hugger Mugger’s blog for 14 years—hard to believe. And it’s equally hard to believe that in all these years, spanning more than 900 posts, I’ve never written a basic blog on how to practice Bridge Pose (Setu Bandha Sarvangasana). In my defense, I have written two articles about practicing Bridge on a Standard Yoga Bolster, here and here. I’ve also written about practicing Setu Bandha with a Yoga Block. But for some reason, Setu Bandha Sarvangasana sans props escaped my mind.
Bridge Pose Benefits
Bridge Pose is a star among yoga poses, and it’s been a staple in my classes for decades. Not only is it an essential yoga pose, but it’s also an important pose in strength training routines. Bridge Pose confers so many benefits. Here are a few:
- Stretches hip flexors, a necessary action for countering the ill effects of too much sitting
- Strengthens back muscles, glutes and hamstrings
- Can relieve back tension
- Promotes improved posture
- Stretches the chest, neck and shoulders
- Calms the nervous system
- May aid digestion (as long as you practice two hours after a meal)
Cautions and Contraindications
Like all yoga poses, Bridge Pose can be contraindicated in certain cases. If you are currently experiencing a neck and/or shoulder injury, it might be best to avoid Setu Bandha Sarvangasana until you are healed. In a future post, I’ll share a variation of Bridge Pose that might be okay to practice with a neck issue.
You might also want to approach Bridge Pose with caution if you are in the early, heavy days of your menstrual period. Many women experience no side effects from practicing Bridge Pose on their period. But there are some women who experience an interruption in their normal flow. This can lead to cramping and subsequent “flooding.” (I was able to practice Setu Bandha on my period for years. Then one day, I experienced these symptoms, and it was highly unpleasant!)
How to Prepare to Practice Bridge Pose
Before practicing Setu Bandha, it can be helpful to warm up the areas of the body that will be doing much of the stretching and strengthening work. These include: glutes, hip flexors, quadriceps, chest, shoulders, abdominals and neck.
Here are a few suggestions for possible warm-up poses. Of course, a couple rounds of Surya Namaskar (Sun Salutations) could work as well:
- Anjaneyasana (Crescent Lunge Pose): Stretches the quadriceps, hip flexors and abdominals.
- Bhujangasana and/or Ardha Bhujangasana (Cobra Pose or Sphinx Pose): Engages the low back, glutes and hamstrings.
- Talasana (Palm Tree Pose): A lateral bend, which helps to mobilize the thoracic spine.
- Jathara Parivarttanasana (Revolved Belly Pose): Any twist will do here, but I like to do Revolved Belly Pose before Setu Bandha because both poses start in a supine position.
- Salamba Matsyasana (Supported Fish Pose): This passive chest-expanding pose can prepare your shoulders and chest muscles for Bridge.
How to Practice Setu Bandha Sarvangasana
- Lie on your back on a nonskid Yoga Mat.
- Bend your knees and place the soles of your feet on the floor.
- Draw your arms close in to your sides, then bend your elbows so that your forearms are vertical.
- Press your upper arms into the floor, and simultaneously arch your low back away from the floor.
- Extend your arms alongside your body.
- Extend your knees outward, away from your pelvis in order to begin to lift your back off the floor. Keep extending your knees outward away from your pelvis as your pelvis lifts into Bridge Pose. Maintain this outward extension isometrically as you hold the pose.
- I prefer extending outward through my legs to lift into the pose, rather than simply pushing up with my glutes. I’ve found that when I push up with my glutes, I overextend my hip joints, which could, over time, wear down the cartilage and labrum. The other thing that happens is that my knees tend to splay out to the sides when I simply push up with my glutes. This doesn’t happen when I isometrically extend my knees outward from my pelvis. You probably won’t lift as high as you would by pushing into your hip joints, but lifting high isn’t the point! Practicing sustainably is far more important.
- Rock side to side onto the tops of your shoulders and clasp your hands underneath you. If your elbows bend when you clasp your hands, practice with your arms parallel on the floor. You can also hold a Yoga Strap between your hands to create a stronger grounding in your arms.
- Take 5 to 10 deep breaths, relaxing your neck, throat, jaw and facial muscles.
- To leave the pose, extend your arms out overhead, along the floor and slowly lower your spine down onto the floor, lengthening as you go. Repeat if you like.
