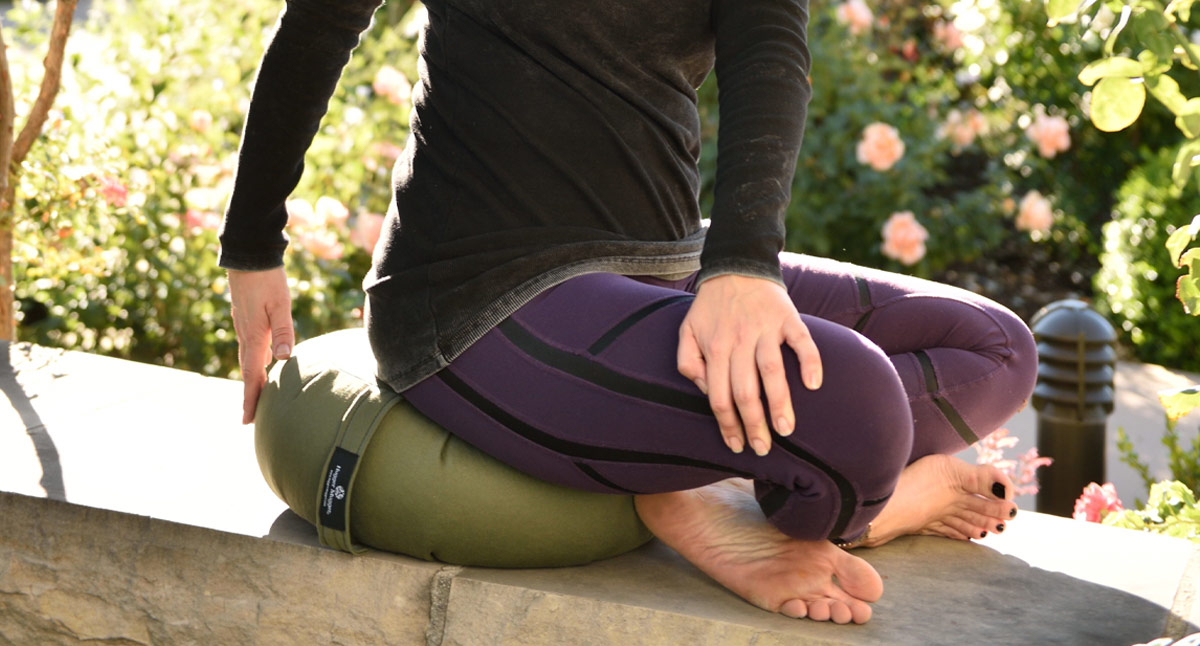
Who doesn’t love a good spinal twist? For most people, rotating the spine feels refreshing. With the exception of twisting to the right to look behind us while we back our cars up or change lanes, we don’t rotate our spines a lot in our daily lives. That could be why twisting feels so good. But twisting in yoga can be perilous for the SI joint if we don’t practice with both care and knowledge. A few weeks ago, I wrote about the importance of not squaring the hips in standing poses. The same holds true for twisting.
Many years ago, I learned from a multitude of yoga teachers that keeping the hips squared in a seated twist helps rotate the lumbar spine. That would make sense if the lumbar spine was capable of rotating. The fact is, the facet joints come together in such a way that the lumbar spine is only capable of about 1 to 3 degrees of rotation. That’s about 2 to 4 millimeters. So when we try to force the lumbar spine to rotate, we can instead end up rotating the sacrum. This can lead to SI joint dysfunction.
How to Keep the SI Joint Safe in Seated Twists
If you are having symptoms of SI joint dysfunction, your best bet is to avoid twisting, at least until you start to feel better. But if your SI joint is feeling okay, try this tip for keeping the joint stable and healthy. The following example explains how to keep your SI joint safe in Parvrtta Sukhasana (Rotated Easy Seated Pose).
- Sit in Sukhasana (Easy Pose) on a folded yoga blanket so that your hips are higher than your ankles.
- Rotate your torso to the right. As you rotate, you will likely feel the right side of your pelvis wanting to scoot back as well. Instead of resisting this, let the right side of the pelvis scoot back. This keeps the twist in the thoracic spine, which is the part of the spine that is designed to twist.
Practicing simple twists in this way can help you avoid SI joint problems in the future. This adjustment can be applied to all seated twists.
It’s important to avoid twists where you’re levering with your arm when your SI joint is out of place or if your SI joint is prone to dysfunction. So you should practice any seated twist where you’re placing your elbow on the outside of an upright, bent knee with care. Instead of placing your elbow on the outside of your knee, simply hold the knee with your hand.

Charlotte,
I so enjoy your articles. They are most informative and helpful for teaching. A question: When initiating a twist, should it begin with the navel, then ribs ( on the side you are twisting to), then shoulder and lastly the head turning over that shoulder? Thank you for addressing this. Happy Holidays!
Actually, it’s best for your SI joint if you initiate with the pelvis, rotating it in the direction of the twist. Then you can turn from the ribcage and lastly, the head and neck. Since the lumbar spine doesn’t twist, it makes sense to start from the pelvis and then move to the ribcage, neck and head, all turning in the direction of the twist. Does this make sense?